The Definitive Guide to the Perfect Cold Brew Coffee Ratio
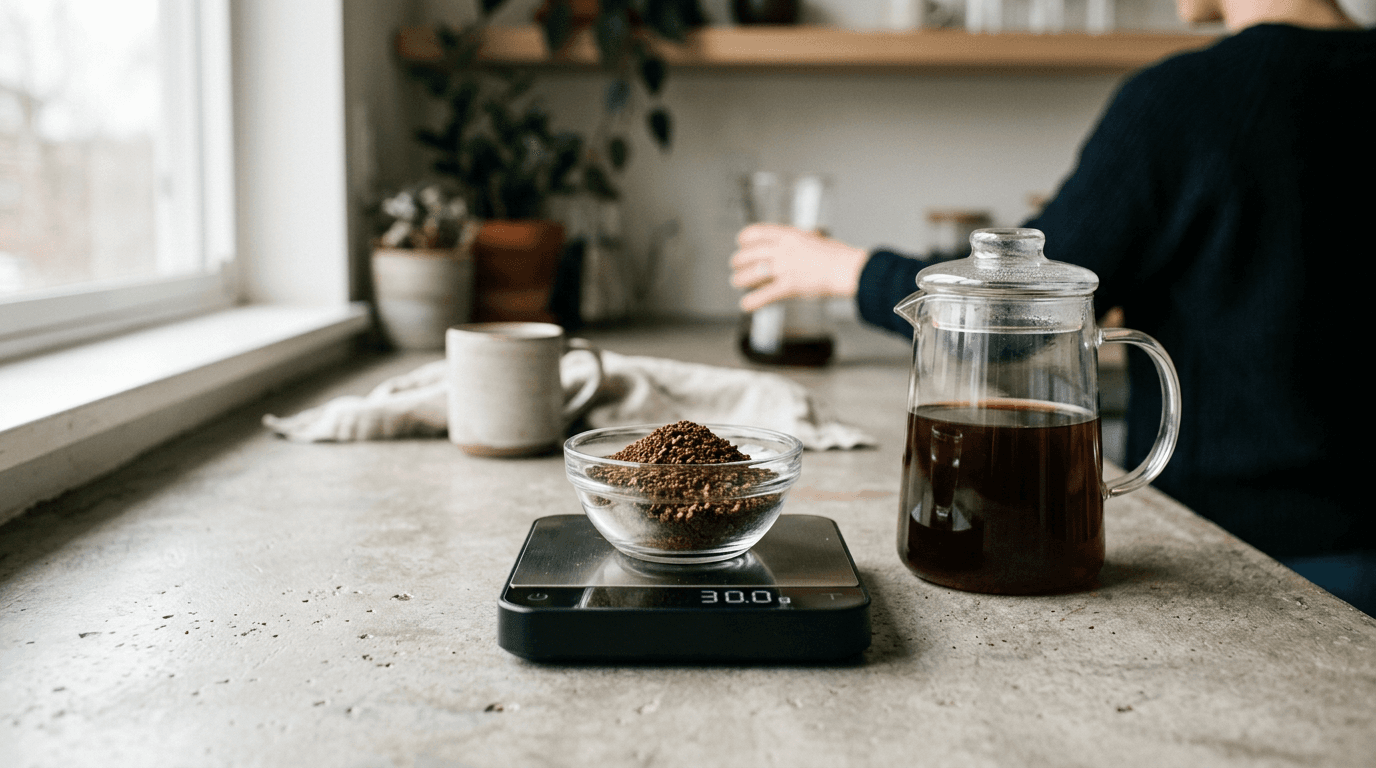
Most home brewers assume cold brew is simply standard hot coffee poured over ice, or a typical drip grind left in a plastic pitcher overnight. The result is almost always a chalky, astringent liquid that tastes more like wet cardboard than specialty coffee. Stripping heat away from the extraction process entirely changes how water acts as a solvent. Without the kinetic energy of boiling water, you lose the ability to rapidly dissolve compounds, which means relying purely on prolonged contact time and a precise cold brew coffee ratio to pull heavy sugars and oils from the beans. Mastering this process requires treating cold brewing not as a lazy alternative to your morning pour-over, but as a distinct extraction method with its own strict rules for particle size, saturation, and storage.
Quick Summary
Cold brewing is a slow-immersion extraction method that uses time rather than heat to dissolve coffee solubles, resulting in a low-acid, highly caffeinated concentrate. Success depends entirely on controlling the variables that dictate extraction speed without temperature.
- Grind size: Extra-coarse (resembling sea salt) prevents over-extraction during long steeps.
- Ratio: A 1:4 or 1:5 ratio by weight creates a versatile, stable concentrate.
- Time: 14 to 18 hours at room temperature, or 20 to 24 hours refrigerated.
- Dilution: Never dilute the bulk batch; always cut individual servings with water or milk just before drinking.
Table of Contents
- 1. Selecting and Grinding the Beans
- 2. Dialing in the Cold Brew Coffee Ratio
- 3. The Steeping Process
- 4. Filtering and Storing
- 5. Serving and Dilution
- Common Pitfalls & Troubleshooting
- FAQ
- Recommended Reads
1. Selecting and Grinding the Beans
Hot water acts as a volatile, aggressive solvent, rapidly dissolving fruit acids, volatile aromatic oils, and complex carbohydrates. Cold water lacks that kinetic energy. It relies on prolonged contact to gently pull out highly soluble compounds - primarily heavy sugars and complex carbohydrates - leaving behind the stubborn, bitter chlorogenic acids. Because this method naturally mutes bright acidity, beans with deep chocolate, caramel, or nutty profiles excel here.
If you are exploring a Single Origin profile, a natural cold brew mexican coffee often provides a heavy cacao and toasted almond base that stands up brilliantly to cold extraction, whereas a highly acidic, washed Kenyan bean might taste flat and underdeveloped. Testing a Best Sellers Sample Pack: 6Bean, Cowboy, Breakfast, Peru, Mexico, Bali allows you to see exactly how different roast levels behave when deprived of heat.
Once you choose your beans, grind size dictates the extraction speed. You need an extra-coarse grind, physically resembling coarse sea salt or breadcrumbs.
The most frequent failure at this stage is buying pre-ground coffee. It is usually tailored for drip machines. At a standard medium grind, the surface area exposed to the water is vastly higher. Over a 16-hour steep, this small particle size accelerates extraction far past the sweet spot. This pulls out the bitter tannins you were actively trying to avoid. It also leaves a silty, muddy sludge at the bottom of the brewing vessel. This sediment is nearly impossible to filter out completely.
2. Dialing in the Cold Brew Coffee Ratio
Brewing cold requires deciding upfront whether you are making a dense concentrate or a ready-to-drink batch. A concentrate requires a tight ratio of coffee to water, typically 1:4 or 1:5 (one part coffee to four parts water). A ready-to-drink batch sits closer to 1:12. Brewing a concentrate is vastly superior because it saves storage space, preserves the coffee longer by reducing the volume of oxygenated water in the container, and offers flexibility in how you serve it later.

Practical rule: Always calculate your ratio by weight in grams, never by volume in scoops, because light roasts take up more physical space than dark roasts for the exact same mass.
Relying on volume for your cold brew coffee measurements guarantees inconsistent batches. A dark roast expands significantly during the roasting process, occupying much more physical volume than a dense, light roast of the exact same weight. If you measure by the cup, your concentrate will swing wildly in strength every time you switch beans.
When calculating your inputs, you must account for liquid retention. Coffee grounds act as a sponge, retaining roughly twice their own weight in water. If you start with 100 grams of a heavy 6 Bean Blend and 500 grams of water (a 1:5 ratio), you will not yield 500 grams of concentrate. The grounds will trap approximately 200 grams of liquid, leaving you with about 300 grams of usable concentrate. Always brew with enough extra water mass to compensate for the liquid trapped inside the swollen grounds.
3. The Steeping Process
Cold brewing is an immersion technique driven by diffusion. Water slowly penetrates the cellular structure of the coffee grounds, dissolving solubles and pulling them out into the surrounding liquid until a state of equilibrium is reached. The temperature of your environment dictates exactly how long this takes.
Steeping at room temperature (around 70°F) provides enough ambient kinetic energy to complete a balanced extraction in 14 to 18 hours. Moving the vessel to a refrigerator (around 40°F) slows the diffusion rate dramatically, requiring 20 to 24 hours. The refrigerated method yields a slightly cleaner, sweeter profile because the colder temperature actively inhibits the extraction of heavier organic matter, but it runs a much higher risk of under-extraction if pulled too early.
The critical mistake brewers make during the resting phase is over-agitating the slurry. It is common to see people forcefully stir the mixture halfway through the process. In immersion brewing, the water immediately surrounding each coffee particle becomes saturated with dissolved solids early on. This creates a localized boundary layer that naturally slows further extraction. Stirring the vessel breaks this protective barrier, exposing the exhausted grounds to fresh solvent and causing severe over-extraction of woody, astringent compounds. Stir exactly once at the beginning to ensure all dry pockets are saturated, then leave the vessel entirely alone.
4. Filtering and Storing
Separating the liquid from the spent slurry requires a gentle, two-stage approach to achieve the clean mouthfeel that defines the style. A single metal mesh filter is rarely sufficient because it allows microscopic fines to pass through into the final beverage.
Pass the liquid through a coarse metal sieve first to catch the large boulders and the bulk of the slurry. Then, run that separated liquid through a pre-rinsed paper filter or a clean cloth filter. The paper catches the microscopic dust and the heavier, insoluble lipids that cause cloudiness and a chalky texture on the palate.
The most common mechanical error during filtration is pressing, squeezing, or wringing out the wet coffee grounds to extract the last few ounces of liquid. Those final drops trapped deeply inside the cellular structure of the grounds are heavily concentrated with the most bitter, unpalatable tannins. Forcing them into your filtered batch immediately ruins the smooth profile you spent 16 hours building. Let gravity drain the liquid at its own pace, and discard the heavy wet mass that remains.
Once filtered, storage chemistry becomes the priority. Oxygen drastically degrades coffee, stripping away its remaining volatile aromatics and replacing them with stale, cardboard-like notes. You must store the concentrate in an airtight glass container in the refrigerator. Plastic containers hold onto the rancid oils from previous batches and will leach those flavors directly into your fresh concentrate.
5. Serving and Dilution
If you brewed a 1:4 or 1:5 concentrate, drinking it straight will overwhelm your palate with heavy density and excessive caffeine. It requires cutting with a diluent - water, dairy, or oat milk - to open up the flavor notes.
Understanding how to dilute requires recognizing the strict chemical boundary between cold brew and iced coffee. Iced coffee is brewed hot - extracting the full spectrum of acidic and aromatic compounds - and then flash-chilled over ice. Cold brew never touches heat, meaning those sharp, bright acids simply do not exist in the concentrate.
Because the bitter compounds were left behind in the grounds, you can easily create a rich warm cold brew coffee by diluting your cold concentrate with boiling water instead of cold water. The sudden heat will not magically create bitterness; it simply warms the existing smooth sugars and heavy oils, making it an excellent, highly digestible option for sensitive stomachs when served in an insulated Enamel Mug.
Alternatively, a strong concentrate forms a robust base for complex cold brew coffee drinks, cutting cleanly through heavy creams, simple syrups, or sparkling tonics without losing its structural coffee identity.
The fatal error at this stage is diluting the entire storage vessel of concentrate immediately after filtering. Adding fresh water to the bulk container introduces vast amounts of new oxygen, which drastically shortens the shelf life of the coffee. Always store the concentrate at its absolute strongest, and dilute individual portions directly in the serving glass precisely when you are ready to drink them.
Common Pitfalls & Troubleshooting
Even with a precise ratio, immersion brewing occasionally yields a flawed cup. Because cold brewing operates in a closed system over many hours, different failures can manifest with similar external symptoms. Use the flavor of the final cup to diagnose the mechanical error.
Symptom: The cup tastes distinctly sour, sharp, or watery.
- Diagnosis: Under-extraction. The water did not have enough time or energy to dissolve the heavier, sweet carbohydrates, leaving only the highly soluble acidic compounds in the liquid.
- Fix: Extend your total steeping time by two to four hours. If you are steeping in the refrigerator, move the brewing vessel to the kitchen counter to increase the ambient kinetic energy.
Symptom: The brew has a powdery, muddy texture and a chalky finish.
- Diagnosis: Excessive fine particles. This is almost never a failure of the filter itself. It usually stems from an inconsistent, cheap blade grinder that shatters the beans unevenly, creating a massive amount of dust alongside the coarse boulders.
- Fix: Sift your ground coffee through a fine kitchen strainer before adding water to remove the loose dust. Long-term, upgrading to a flat-burr grinder is the only permanent solution for immersion consistency.
Symptom: The coffee tastes intensely woody, dry, or astringent.
- Diagnosis: Over-extraction. The water remained in contact with the grounds long enough to begin breaking down the fibrous plant material of the bean itself, pulling out harsh, woody structural elements.
- Fix: The most frequent root cause is ambient temperature running too high in the room during a long steep. Reduce your steeping time by roughly three hours, or verify that nobody stirred or agitated the container during the middle of its resting phase.
Symptom: The concentrate lacks body and tastes aggressively weak despite a tight ratio.
- Diagnosis: Dry pockets. The water never fully saturated all the grounds, meaning a large percentage of your coffee simply sat dry inside a clump, contributing nothing to the extraction.
- Fix: Pour your starting water over the grounds in slow, concentric circles. Once all the water is added, take a spoon and gently press the floating crust of coffee down into the liquid until every aggregate clump is broken and submerged.
FAQ
Can I use older, stale coffee beans for cold brewing? Yes, to a degree. The cold extraction process naturally mutes volatile aromatics, which are the exact compounds that vanish first as roasted coffee ages. While fresh beans always yield superior complexity and depth, cold brewing is highly forgiving and remains the most effective way to utilize older beans that would taste entirely flat and lifeless in a hot pour-over.
Why is my cold brew cloudy instead of translucent? Cloudiness occurs when microscopic coffee fines bypass your primary filtration, or when the natural, heavy coffee oils congeal in the cold temperatures of your refrigerator. Running the finished batch through a dense, rinsed paper filter rather than relying solely on a metal mesh easily resolves the fine particulate issue and strips out enough oil to restore clarity.
Do I have to steep the mixture in the refrigerator? No. Room temperature is the industry standard for commercial brewing because it is highly efficient, yielding a robust, balanced extraction in 14 to 18 hours. Refrigerating the brewing vessel is entirely optional; it simply slows the chemical diffusion rate, thereby requiring a much longer 20 to 24-hour steep to achieve the exact same strength.
How long can I store the filtered concentrate? When kept undisturbed in an airtight glass container in the refrigerator, the undiluted concentrate remains chemically stable for 10 to 14 days. After this two-week window, oxidation begins to noticeably flatten the flavor profile, introducing stale, cardboard-like notes that dilution can no longer mask.