How to Use a Coffee Press: Controlling Variables for Optimal Extraction
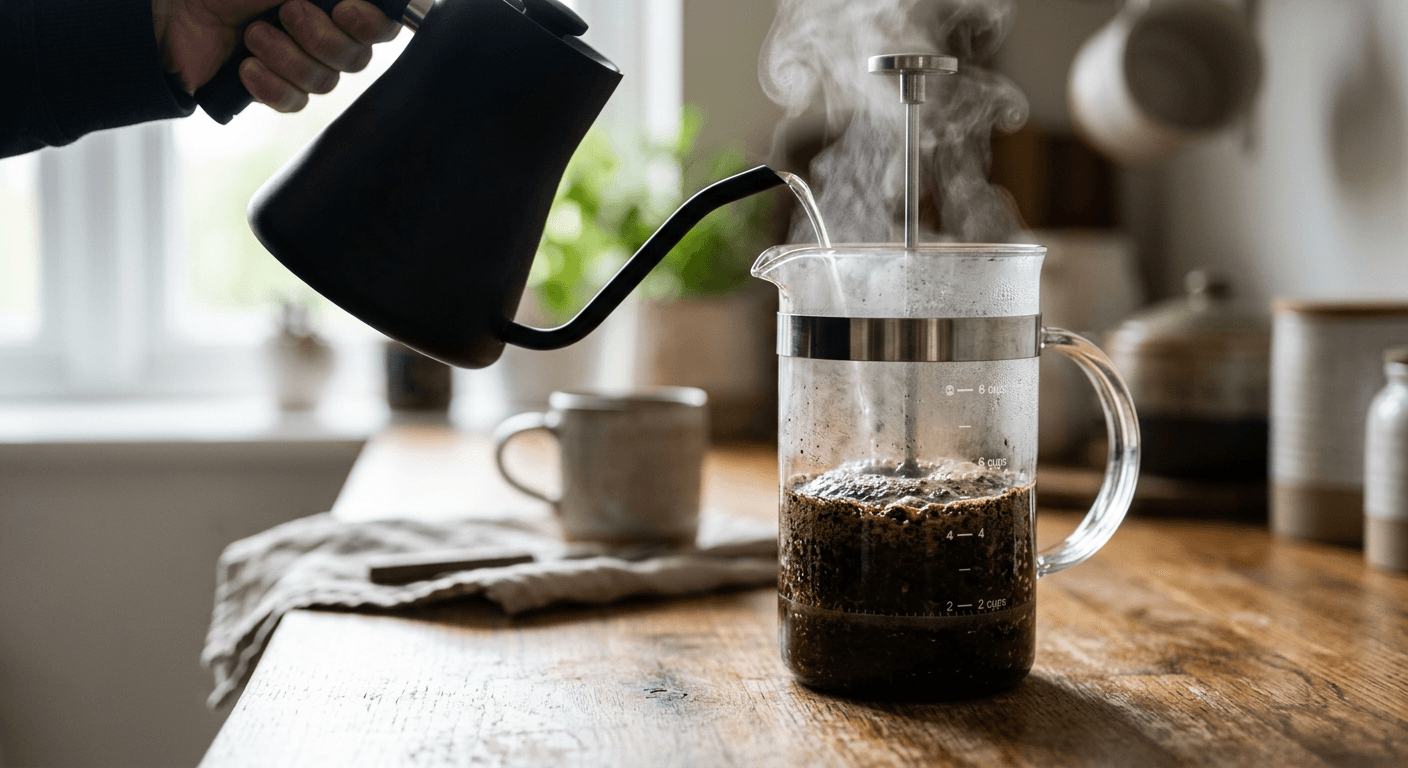
You push the plunger down, pour your first morning cup, and are immediately hit with an overwhelming wave of harsh, silty liquid that coats the back of your throat. Most people blame the beans when this happens, but the culprit is almost always a failure in the extraction process. Knowing exactly how to use a coffee press requires taking deliberate control of the variables that automatic machines usually handle for you. A press is an immersion brewer, meaning the water and the grounds sit together in one continuous bath rather than passing through a paper filter. If you do not actively manage the water ratio, the temperature, and the physical particle size, the water will relentlessly strip every bitter compound out of the roasted bean. By understanding the mechanical limits of immersion brewing, you can transform premium coffee from a muddy disappointment into a heavy, structured, and perfectly balanced cup.
Quick Summary
Mastering immersion brewing requires precise control over your water-to-ground ratio, thermal management during the steep, and immediate decanting to halt extraction. Because the grounds remain in constant contact with the water, timing and particle size dictate whether your cup is rich and balanced or harshly bitter.
- Weigh your inputs to maintain a strict 1:15 ratio.
- Grind beans coarsely to slow the extraction rate and prevent heavy sludge.
- Perform a 30-second bloom to release trapped carbon dioxide.
- Pour the brewed liquid into a separate vessel immediately after plunging.
Table of Contents
- Why knowing how to use a coffee press dictates your extraction ceiling
- 1. Weighing the water and the coffee grounds
- 2. Grinding the beans just before brewing
- 3. The bloom phase
- 4. The main steep
- 5. Plunging and decanting
- Common Pitfalls & Troubleshooting
- FAQ
- Recommended Reads
Why knowing how to use a coffee press dictates your extraction ceiling
Immersion brewing is fundamentally different from percolation. In a standard drip machine or a pour-over setup, fresh, clean water is continuously introduced to the grounds, pulling out soluble compounds and then draining away. In a press, the total volume of water sits with the total volume of grounds for the entire duration of the brew. As the water extracts acids, sugars, and eventually tannins, the liquid becomes increasingly saturated. This means the solvent itself changes over the four-minute brew time. You are operating in a closed system where mistakes accumulate. If your water is too hot, your grind too fine, or your steep too long, there is no paper filter to catch the resulting astringency. The metal mesh only stops large physical particles; it does nothing to filter out dissolved bitter oils. Controlling this environment requires treating each step as a mechanical barrier against over-extraction.
1. Weighing the water and the coffee grounds
The french press coffee ratio is a fixed physical boundary
Hot water breaks down the solid structure of coffee grounds, dissolving a portion of their physical matter. However, the human palate only enjoys the compounds extracted during a specific phase of this process. Stop the brew too early, and the cup is fiercely sour; pull out too much material, and it becomes aggressively bitter and drying. The french press coffee ratio is the mathematical formula that locks your brew into that narrow, pleasant window. A standard, highly reliable starting point is a 1:15 ratio, meaning one gram of coffee for every 15 grams of water.
Measuring by volume rather than by weight is the first point of failure for most home brewers. Darker roasts expand significantly in the roasting drum while simultaneously losing moisture mass. Because they are puffed up and physically lighter, a tablespoon of a dark, oily roast contains significantly less actual coffee matter than a tablespoon of a dense, lightly roasted bean. If you attempt to brew an African espresso blend using volumetric scoops, you will unknowingly under-dose the heavy beans, resulting in a weak, watery cup. You must use a digital kitchen scale. Place your empty carafe on the scale, tare it to zero, add your whole beans to check the dry weight, and then calculate your required water weight before you begin pouring.
Practical rule: When dialing in a new bag of beans, change only the grind size or the water temperature, but never alter your 1:15 ratio until you understand exactly how the bean behaves at that baseline.
2. Grinding the beans just before brewing
Why coarse ground coffee for french press prevents over-extraction
Water extracts flavors from the outside of a particle inward. If a coffee particle is cut into microscopic dust, the hot water saturates it instantly, pulling out the desirable sugars in seconds and then spending the next three minutes pulling out harsh, woody tannins. If the particle is large, the water must slowly penetrate the cellular structure, pacing the extraction perfectly over a longer immersion time.
This is why coarse ground coffee for french press is non-negotiable. The long steep requires a large physical barrier to slow the extraction kinetics down. However, size is only half the equation; uniformity is the other. The fatal mistake most users make here is relying on a cheap rotary blade grinder. Blade grinders do not crush beans; they shatter them randomly, producing massive boulders alongside microscopic powder known as "fines." During a four-minute steep, the boulders under-extract and taste sour, while the fines wildly over-extract and taste bitter. The resulting cup is a confusing, muddy mixture of both defects. To brew a highly structured, complex 6 bean blend, you need a burr grinder that mechanically crushes the beans to a uniform, chunky consistency reminiscent of coarse sea salt. Furthermore, pre-ground coffee bought from a supermarket is almost always calibrated for fast-draining automatic drip machines; using it in a press guarantees a bitter, over-extracted result with heavy silt at the bottom of the cup.
3. The bloom phase
Trapped carbon dioxide physically repels water contact
During the roasting process, amino acids and reducing sugars react violently under high heat, forming massive amounts of carbon dioxide that become trapped within the cellular structure of the bean. When you introduce hot water to fresh grounds, this gas rapidly expands and escapes. If you simply pour all your water into the carafe at once, the escaping gas pushes the dry grounds upward, forming a thick, floating crust at the top of the vessel. The gas acts as a physical shield, preventing the water from penetrating the coffee particles trapped in the center of that crust.
Understanding how to make french press coffee requires actively managing this degassing phase, known as the "bloom." Place your carafe on the tared scale. Pour exactly double the weight of your coffee in hot water - if you used 30 grams of coffee, pour 60 grams of water. Stop pouring. You will see the slurry violently bubble and expand. Wait 30 to 45 seconds for the gas to clear, then use a spoon to gently fold the crust into the water, ensuring every single dry pocket is fully saturated before pouring the remaining water weight. Skipping this step when testing freshly roasted beans from curated sample packs guarantees an uneven brew, as the freshest beans contain the highest volume of trapped gas and will actively repel the water if not bloomed correctly.
4. The main steep
Thermal loss naturally dictates your brewing time limit
The standard brewing time for a coffee press is four minutes, but this is not an arbitrary number. It is a calculation based on the thermal dynamics of a glass carafe in a room-temperature kitchen. Unlike a percolator that constantly receives fresh boiling water, an immersion brewer loses heat the second the water leaves the kettle.
You should start your pour with water just off the boil, ideally between 200°F and 205°F. At this temperature, the water efficiently breaks down the bright, desirable fruit acids. As the four minutes progress, the temperature inside the glass carafe drops steadily into the 190s, and then the 180s. This natural thermal decay is highly beneficial. As the temperature drops, the water loses its kinetic energy and its ability to extract the heavier, darker, astringent compounds that require high heat to dissolve. The steep naturally stalls itself right before the cup becomes overly bitter. The critical mistake users make during this phase is aggressive agitation. Stirring the carafe halfway through the four minutes forces the suspended grounds to drop to the bottom prematurely, halting their extraction while forcing microscopic fines through the mesh filter later. Let the thermal mass do the work entirely undisturbed. This hot, rapid extraction profile is the exact opposite of cold brew coffee, where a low thermal mass demands 12 to 24 hours of steep time to achieve the same total dissolved solids.
5. Plunging and decanting
The internal metal mesh stops the grounds, not the extraction process
The plunger assembly on a french press coffee maker consists of a cross-plate, a spiral spring, and a fine wire mesh. Its sole mechanical function is to push the floating particulate to the bottom of the carafe so you can pour the liquid off the top without drinking the grounds. It does not create a watertight seal, and it does not isolate the water from the coffee mass.
This leads to the single most common failure in immersion brewing: using the press as a serving carafe. Once the plunger is depressed, the brewed liquid surrounding the compressed puck of grounds at the bottom is still in active contact with the coffee. Chemical extraction continues indefinitely as long as moisture touches the bean. Chlorogenic acids will continue breaking down into harsh quinic and caffeic acids. If you pour a cup and leave the remaining volume in the press to stay warm, the second cup poured ten minutes later will be drastically more bitter, astringent, and metallic than the first. You must halt the extraction manually. The moment the four-minute steep concludes and you depress the plunger, pour the entire contents of the carafe into a pre-warmed thermos or an enamel camper mug. Separating the liquid from the spent grounds is the only way to lock in the flavor profile you just spent four minutes carefully building.
Common Pitfalls & Troubleshooting
Immersion brewing failures rarely happen in isolation, but they produce distinct symptoms that tell you exactly which variable went wrong.
-
Symptom: The plunger requires intense physical force to push down, and the resulting cup is thick with mud. Diagnosis: The filter screen is severely clogged with "fines." This is the most common real cause of a failed press brew, and it is entirely the fault of the grinder. A blade grinder or an uncalibrated burr set has shattered the beans into dust, which immediately packs into the wire mesh. Back off the pressure immediately - forcing the plunger down can shatter the glass carafe under the pressure. The only fix is upgrading to a high-quality burr grinder that yields uniform, coarse pieces.
-
Symptom: The coffee is overly sour, salty, and lacks any heavy body or sweetness. Diagnosis: Textbook under-extraction. The water failed to penetrate the cellular structure deeply enough to pull out the heavy sugars. This happens when the water temperature is too low (under 195°F) or the steep time was cut short. Ensure your kettle reaches a rolling boil, wait precisely thirty seconds off the heat, and pour. Do not plunge before the four-minute mark.
-
Symptom: The flavor is intensely dry and leaves a dusty, astringent finish on the palate, even when using light roasts. Diagnosis: Over-agitation. While stirring is required during the initial 30-second bloom phase to saturate the crust, stirring violently at minute three forces microscopic particles through the mesh screen and artificially accelerates the extraction of bitter tannins. Limit your agitation strictly to the initial bloom.
-
Symptom: The flavor profile is flat, hollow, and tastes watery despite using a proper 1:15 ratio. Diagnosis: Channeling or severe dry pockets formed during the pour. You skipped the bloom phase, causing the water to drain around a dense, dry clump of off-gassing coffee. Ensure the crust is fully saturated by gently folding the grounds into the water before filling the rest of the carafe.
FAQ
Does the type of water matter for immersion brewing? Yes. Because a finished cup is over 98% water, the chemical makeup of your water dictates what can be extracted. Hard water containing excessive calcium neutralizes delicate fruit acidity, making complex beans taste entirely flat. Conversely, perfectly distilled water lacks the mineral content required to actually pull the flavor compounds out of the cellular structure. Use filtered tap water or balanced spring water for optimal results.
How do I clean the mesh screen without trapping stale oils? You must fully disassemble the plunger unit after every single use. Simply rinsing the assembled plunger under a tap leaves microscopic coffee oils trapped between the fine mesh and the stabilizing cross-plate. These oils turn rapidly rancid when exposed to air, acting as a corrosive agent that will taint every future brew with a metallic, stale flavor. Unscrew the rod, separate the three metal plates, wash them with a neutral detergent, and dry them fully.
Should I skim the foam before plunging? Skimming the foamy "crema" and the floating particulate off the top of the carafe with two spoons before you place the lid on is an optional but highly effective step. The foam traps bitter particulates and fines. Removing it before you plunge yields a significantly cleaner, lighter body that closely mimics the clarity of a pour-over.
Can a long steep compensate for stale, old beans? No. Stale beans have lost their volatile aromatic compounds entirely; no amount of time or heat can extract flavors that are no longer physically present in the organic matter. A longer steep will only extract heavier, woody compounds, resulting in a cup that tastes like wet cardboard. You cannot artificially generate freshness through brewing mechanics.