How to Maintain Your Coffee Equipment for Peak Brewing Performance
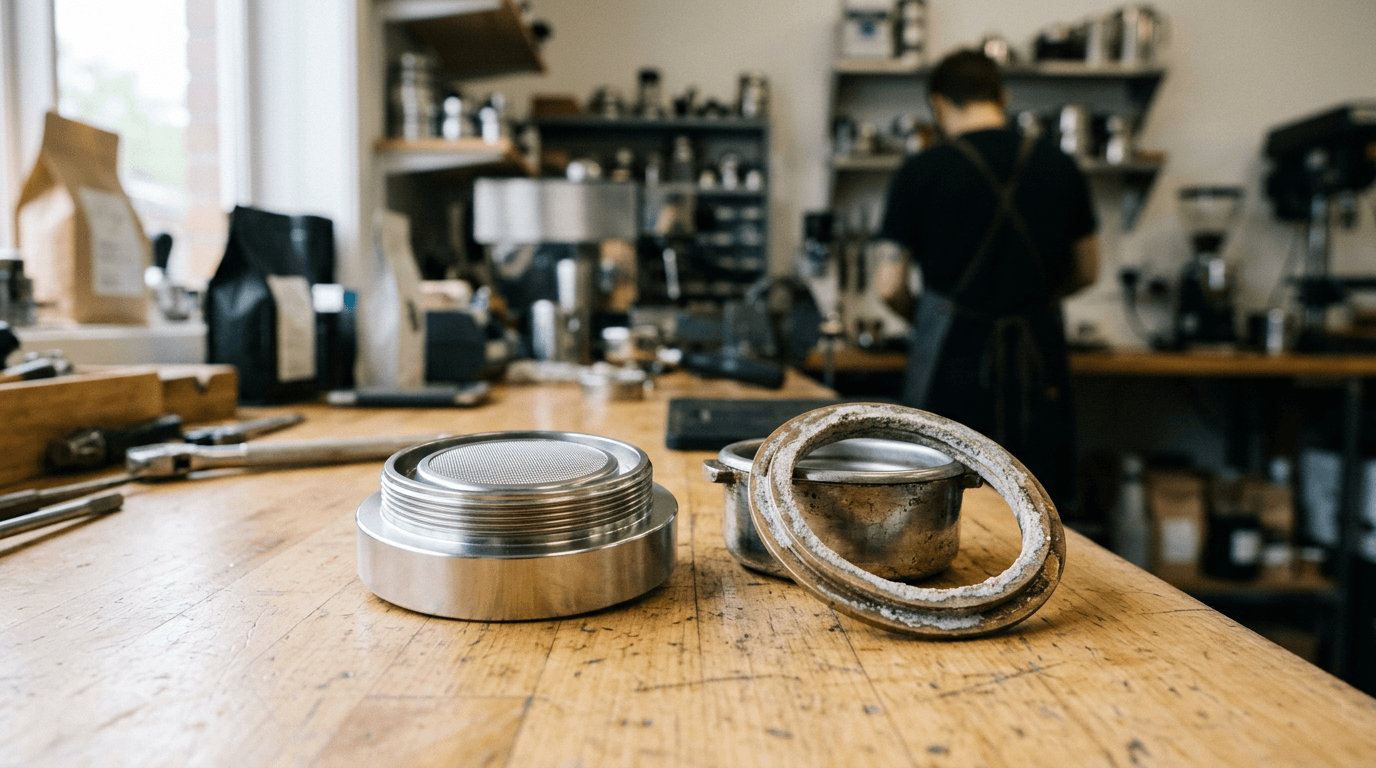
You power on the machine, lock in the portafilter, and flip the switch - only to hear the pump choke, sputter, and push three drops of lukewarm, bitter liquid into your cup. This is the exact moment most users blame the beans or assume the water pump has died. In reality, calcium scale has choked the thermoblock, and oxidized oils have cemented the dispersion screen shut. Keeping your coffee equipment out of the repair shop is not about wiping down the drip tray. It requires pulling apart the flow paths where heat, water, and lipids interact under pressure.
Quick Summary
Maintaining coffee extraction systems requires actively managing mineral buildup, organic oil oxidation, and milk protein adhesion before they permanently obstruct water pathways. Routine maintenance protects internal components from premature failure and guarantees consistent thermal stability during brewing.
- Descaling boilers prevents mineral insulation from destroying heating elements.
- Disassembling burr carriers removes rancid lipid buildup that taints fresh roasts.
- Backflushing group heads forces trapped espresso particles out of solenoid valves.
- Purging steam wands immediately after use stops milk proteins from hardening inside narrow steam jets.
Table of Contents
- Why mineral scale destroys your coffee equipment first
- How stale oils contaminate the grinder burr set
- Where milk proteins block steam pressure
- How micro-fines permanently choke extraction paths
- Why solenoid valves fail without chemical backflushing
- Common Pitfalls & Troubleshooting
- FAQ
- Recommended Reads
Why mineral scale destroys your coffee equipment first
Water is a powerful solvent. As it passes over ground coffee, it extracts soluble flavor compounds. But before it even hits the grounds, hard tap water drops calcium and magnesium deposits along the internal plumbing of your coffee brewing machine. This mineral scale binds directly to the metal walls of the boiler and the narrow channels of thermoblock heating systems, creating a solid layer of thermal insulation. The heating element is forced to run significantly longer to reach target brewing temperatures, eventually burning itself out from prolonged thermal stress.
The mechanics of descaling require introducing a weak acid to dissolve these calcium bonds without corroding the surrounding brass, copper, or stainless steel components. Commercial descaling solutions use citric or tartaric acid specifically formulated to pass safely through narrow Teflon tubes and delicate silicone gaskets.
The most common failure at this stage is substituting commercial descalers with household white vinegar. Acetic acid is highly aggressive toward the soft rubber O-rings that seal the pump connections and boiler pathways. Over time, vinegar dries out these seals, causing internal micro-leaks that drip hot water directly onto the main logic board. Furthermore, vinegar leaves a persistent residual odor that permeates the internal plastics, permanently tainting the flavor profile of the brew.
Practical rule: Use a dedicated espresso machine descaler matched to your boiler material, and flush the system with three times the volume of the descaling reservoir to guarantee no residual acid remains in the water path.
If you use a dedicated gooseneck kettle to heat water for delicate loose-leaf Tea, descaling the kettle monthly prevents those same mineral deposits from flaking off directly into your cup and ruining the clarity of the infusion.
How stale oils contaminate the grinder burr set
Coffee beans are remarkably dense with lipids. As the burrs crush the beans, friction heats these organic oils, coating the grinding teeth, the discharge chute, and the anti-static sweepers. If left exposed to ambient oxygen, these oils go rancid within a matter of days. When you load a freshly roasted, delicate batch into a dirty grinder, every new particle drags through that layer of oxidized oil. The result is a cup that tastes overwhelmingly metallic and bitter, masking the natural origin notes of the bean.

What separates heavy-duty commercial coffee shop equipment maintenance from casual home cleaning is the absolute requirement to expose and brush the grinding burrs themselves. Purging the grinder by simply running a few grams of fresh beans through it only pushes out loose chaff; it does absolutely nothing to strip the sticky, oxidized oil buildup from the steel cutting surfaces.
To maintain precision, you must remove the upper burr carrier and vacuum the grinding chamber completely. Use a stiff-bristled brush or a wooden pick to sweep out the fine particles packed tightly into the screw heads and the base of the cutting teeth.
The mistake users make here is attempting to clean steel burrs with water or a damp cloth. Carbon steel and even some stainless alloys will instantly develop surface rust when exposed to moisture, destroying the sharp, microscopically precise cutting edges required for an even grind distribution. Another frequent error is running raw rice through the burrs to absorb oils. Raw rice is substantially harder than roasted coffee beans and can easily chip ceramic burrs or permanently strain the grinder's drive motor. If you are preparing a 6 Bean Blend with a darker roast profile, expect to perform this teardown weekly, as darker roasts exude significantly more surface oil than lighter alternatives.
Where milk proteins block steam pressure
Steaming milk involves injecting high-velocity, superheated water vapor into a cold liquid. When the mechanical steam valve shuts off, the sudden drop in internal pressure creates a vacuum that immediately pulls a small amount of milk backward into the tip of the coffee frother. Milk contains casein, a complex protein that denatures and bakes into a cement-like crust when exposed to the 250-degree Fahrenheit temperatures of the wand.
If this protein structure hardens inside the narrow one-millimeter steam jet holes, it forces the high-pressure steam to exit at unpredictable, aggressive angles, destroying your ability to create a smooth micro-foam vortex. Internally, the baked milk slowly travels up the wand and coats the mechanical steam valve itself, preventing it from sealing completely and leading to a constant, annoying drip onto the drip tray.
Proper maintenance requires mechanical purging and chemical breaking of the protein bonds. The mechanical purge must happen within three seconds of pulling the wand out of the pitcher - well before the milk has time to dry. Open the valve fully for a one-second burst to aggressively expel the trapped milk, then immediately wipe the exterior with a dedicated, damp microfiber cloth.
The failure mode here is using an abrasive scouring pad to scrape off milk crust that was allowed to dry overnight. Abrasives scratch the polished stainless steel or the non-stick Teflon coating on the wand. Once the surface is scratched, milk proteins have microscopic grooves to anchor into, ensuring the wand will clog faster and burn milk instantly during every subsequent use. When preparing concentrated extractions like Cold Brew Coffee, milk additions are usually cold, but for any hot milk application, the physical pristine condition of the wand dictates the texture quality.
How micro-fines permanently choke extraction paths
During extraction, nine bars of pressure force hot water through a tightly compacted bed of grounds. This immense pressure naturally drives the smallest coffee particles - known as micro-fines - down into the microscopic holes of the filter basket and the metal mesh of a reusable coffee filter. Over successive brews, these fines bake into place against the hot metal, drastically reducing the total open area for liquid to escape.

When the basket holes clog, the pressurized water meets uneven resistance. It finds the path of least resistance, aggressively channeling through one weak side of the coffee puck while leaving the rest completely under-extracted. The shot pours erratically, splashing across the machine's front panel. The physical maintenance requires holding the empty basket up to a strong light source; if you cannot see light clearly through every single hole, the mesh is compromised. You must soak the basket in a specialized alkaline espresso cleaning powder dissolved in boiling water to break down the carbonized organic matter, then scrub the mesh aggressively from the underside.
The accompanying tool in this preparation step, the coffee tamper, suffers from an entirely different mechanical issue. As you compress the bed of grounds, a slight vacuum effect often pulls a few particles up onto the flat base of the tamper. The mistake users make is tapping the heavy metal tamper against the side of the portafilter to knock those loose grounds back into the basket. This metal-on-metal impact chips the sharp edge of the tamper and heavily dents the brass rim of the portafilter. A dented rim prevents a flush seal against the silicone group gasket inside the machine, causing pressurized hot water to leak rapidly over the sides of the handle during the brew. If you are dialing in different grind settings for All Coffee varieties, a pristine tamper base ensures a perfectly level tamp every time, eliminating major physical variables in your extraction.
Why solenoid valves fail without chemical backflushing
Machines equipped with a three-way solenoid valve feature a mechanical pressure-release system. The exact moment you stop the extraction, the valve clicks open, redirecting the intense residual pressure from the portafilter directly down into the drip tray. This crucial mechanism allows you to remove the handle immediately without hot, pressurized grounds exploding outward across the counter.
However, this sudden backward rush of water carries sticky espresso oils, fines, and cellular debris directly up into the internal valve mechanism. If these organics are allowed to accumulate, the solenoid valve eventually sticks open or jams shut. A stuck valve will either bleed pressure constantly during a shot, resulting in an incredibly weak extraction, or fail to release pressure entirely, leaving a soupy, pressurized mess in the basket.
Backflushing is the primary mechanic used to clear this pathway. You insert a blind basket - a filter with absolutely no holes - into the portafilter, add espresso machine detergent, and engage the pump. The pressure builds up against the blind basket, forcing the soapy water aggressively backward through the dispersion screen and directly into the solenoid valve to clear out the debris.
The crucial failure here is backflushing too frequently with chemical detergents on a machine with a vibrating pump, or worse, backflushing a machine that does not actually have a three-way solenoid valve. Machines with simple spring-loaded brew valves cannot be backflushed; attempting to do so will dead-head the pump and instantly blow internal Teflon water lines. Even on compatible machines, heavy chemical detergent strips all the naturally lubricating coffee oils from the mechanical cam in traditional E61 group heads. If you chemically backflush every day, the metal lever will grind against the dry brass internals, wearing down the cam until the brew valve fails to open fully. After a proper chemical flush, pulling a test shot from a Best Sellers Sample Pack: 6Bean, Cowboy, Breakfast, Peru, Mexico, Bali will re-lubricate the mechanical components and season the bare metal before you brew a cup to actually drink.
Common Pitfalls & Troubleshooting
When extraction systems fail, the external symptoms rarely point to the actual internal component causing the issue. Diagnosing the problem correctly prevents you from replacing expensive, fully functional parts when a simple, targeted cleaning protocol would resolve the fault entirely.
The pump engages, but water flow is restricted or non-existent Users immediately assume the main water pump has burned out. If the pump is visibly vibrating or making a loud, straining hum, the pump is mechanically functional but facing an impenetrable physical blockage.
- The real cause: Most often, severe mineral scale has bridged a narrow juncture inside the thermoblock, or a flake of scale has broken off and jammed inside the small opening of the flow meter.
- The fix: If the machine can push even a few drops of water, run a heavily concentrated descaling solution through the system, letting it sit inside the boiler for twenty minutes at a time to aggressively dissolve the blockage. If water cannot move at all, the machine requires a physical teardown to manually clear the PTFE tubing.
The steam wand produces hot water instead of dry steam The instinct here is to manually increase the boiler temperature or assume the main heating element is failing to flash-boil the water.
- The real cause: The micro-pores in the steam tip are partially obstructed by dried milk casein. The boiler is successfully producing steam, but the highly restricted exit forces the vapor to condense back into liquid water as it struggles to escape the wand.
- The fix: Unscrew the tip entirely, soak it in a dedicated dairy-cleaning solution to break down the tough protein matrix, and carefully clear the jet holes with a steel pin.
Espresso channels aggressively, splashing out of the portafilter It is easy to blame a poor tamping technique, stale beans, or a grinder throwing inconsistent boulder-sized particles into the basket.
- The real cause: The dispersion screen bolted inside the group head is completely choked with rancid coffee residue. Instead of showering water gently and evenly across the coffee bed, the clogged screen creates high-pressure jets that bore physical holes into the compacted grounds.
- The fix: Remove the retaining screw holding the dispersion screen in place. Soak the screen in hot alkaline espresso machine detergent until the fine mesh is entirely clear of black, carbonized buildup.
The brew boiler leaks clear water onto the counter A puddle under the machine leads people to tighten every visible screw or assume the main boiler has cracked under severe thermal stress.
- The real cause: Using standard household vinegar for descaling has dried out, cracked, or deformed the vital silicone O-rings connecting the Teflon water lines to the boiler inlet.
- The fix: Stop using vinegar immediately. Open the casing, safely identify the source of the leak while the machine is under pressure, and replace the hardened silicone seals with factory-spec replacements.
FAQ
How often should I descale my home brewing system? Descaling frequency depends entirely on your local water hardness and the total volume of water pushed through the system. If you use heavily mineralized tap water, you must descale every four weeks. If you use properly filtered or softened water, running a descaling cycle every three to four months is sufficient to prevent boiler insulation.
Can I put my portafilter and filter baskets in the dishwasher? No. Dishwasher detergents are highly abrasive and will aggressively strip the protective chrome plating off commercial brass portafilters, exposing bare metal that imparts a harsh, metallic taste to the espresso. The extreme heat will also degrade the plastic or wood handles. Always soak the metal baskets separately in a specialized coffee detergent.
Why does my grinder output slow down over time? Darkly roasted beans exude heavy surface oils that mix with fine coffee dust to form a thick, tar-like substance inside the grinding chamber. This accumulation narrows the discharge chute and coats the anti-static sweepers, severely restricting the volume of grounds the burrs can expel. A full manual teardown and brushing restores the original output speed.
Is it necessary to backflush if I only pull one shot a day? If your machine features a three-way solenoid valve, you must perform a fast, water-only backflush daily to clear loose grounds from the valve, regardless of your daily shot volume. A chemical backflush with detergent should be reserved for every four to six weeks to strip the heavy oil buildup without prematurely wearing out the mechanical cam lubrication.